Wasting good money on chicken breasts only to incinerate them in the pan? We’ve all been there. But it doesn’t have to be this way.
Time to crack the code to golden, tender perfection using six simple steps.
No more sad, dry, burnt disasters. Follow along, and unlock a world of delicious meals. ⬇️
Step 1: Halve Chicken Breast (Optional)

Smaller portions mean the heat actually reaches the center of the chicken breast, cooking it through faster – and safely.
Step 2: Pound To Even Thickness
Wrap each piece of chicken in plastic wrap (or wax paper). Then give them a good ol’ smash with either the bottom of a sturdy pan or meat tenderizer.
The goal isn’t to pulverize it into submission but to gently coax it into an even thickness—so it cooks without one end drying out while the other stays raw.
The other option here is to use your chefs knife to butterfly each piece.

Step 3: Season
Sprinkle a dash of salt and pepper on both sides of your chicken breast before it hits the pan for an instant shot of flavor!

Step 4: Heat Cooking Oil
Before the chicken goes in the pan the oil should be hot. As in, you should hear a sizzle the second the chicken hits the pan.
But how do you know when the oil is hot? Here’s a no-fail (and safe) way to check… ⬇️
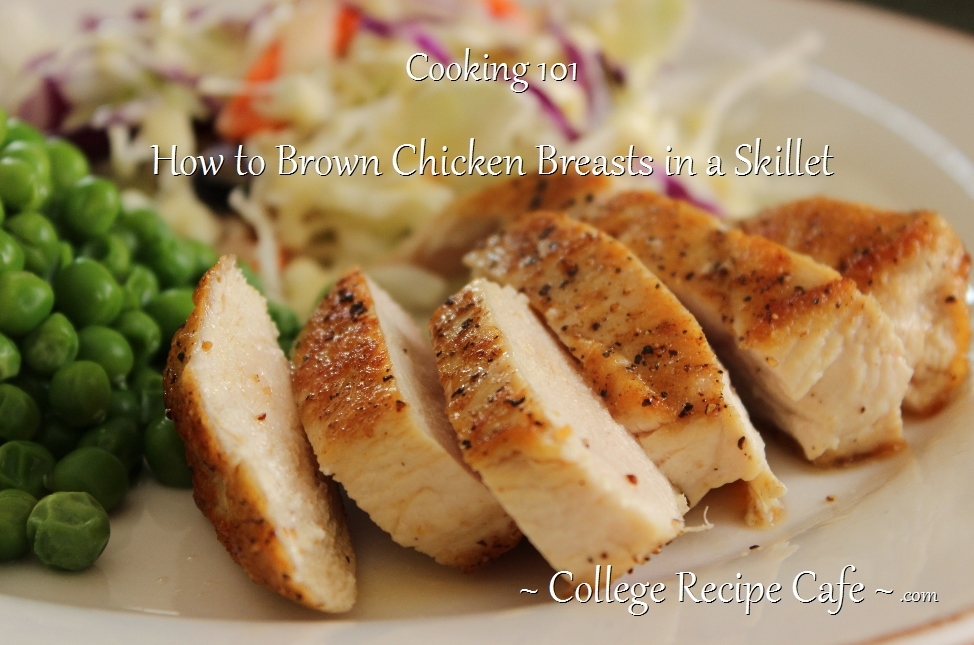
Step 5: Brown and Cook
Place the chicken breast in a skillet that has been heated over medium heat (go medium-low if doing this for the first time). Then take one BIG step back from the cook-top. Why step back? Because this puts you out of reach of flipping the chicken breast to often.
Give the skillet a full 3 minutes to work its magic. If you see the oil start to smoke, slightly reduce the heat.

After 3 minutes, step forward and gently lift the chicken off the bottom of the skillet.
Is it golden-brown? If not, give it another minute then check again. Repeat the cooking steps to brown the other side.
Step 6: Let Rest Before Slicing

Resist the urge to slice in the second the chicken leaves the pan.
Give it a minute or two to rest (preferably on a rack). This gives the juices inside just enough time to calm down, so they don’t come pouring out like a crime scene when you slice into it.
Happy Cooking! 😋
Your Next Challenge?
Roast a Whole Chicken Without The “Ick’ of Touching It!
Do this and you’ll make browning chicken breast in the pan look like child’s play (even though cooking an impressive whole chicken is easier…shh 🤫).
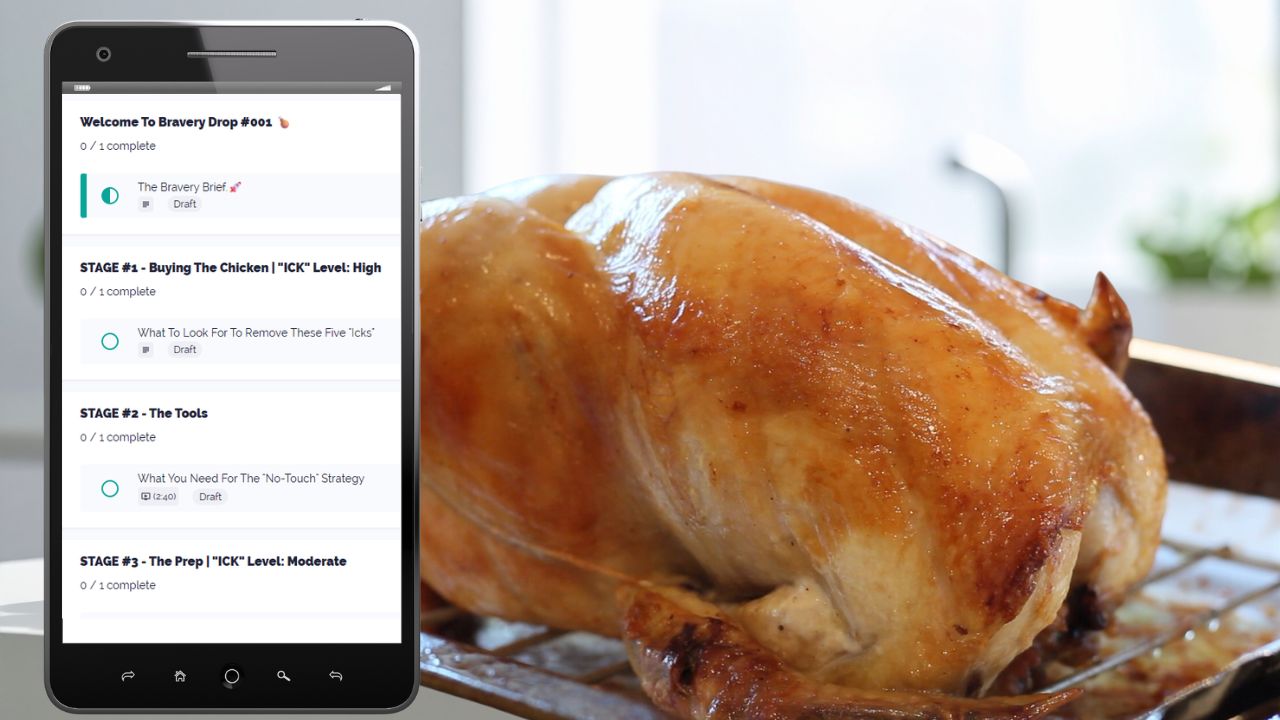
Is it uncomfortable the first time? Yeah. But it’s doesn’t have to be “icky” when you have everything you need to:
✔️ Prepare the chicken
✔️ Not touch it (ick)
✔️ Follow through and not just watch
This Should I Cook It? Bravery Drop begins April 14th, 2026. It gives you everything to make sure you’re good to go.
Complete this challenge, and you’ll taste the deliciousness of next level confidence in the kitchen.
Let’s do this together!
SAVE OR PIN FOR LATER


Brent Garell (hey that’s me!) is the founder of College Recipe Cafe and Should I Cook It? where you put our bravery to the test…in the safety of your kitchen.
Thanks for visiting the Café! Let’s Connect


I tried the pan bottom to beat the chicken flat, unfortunately it was after work and after a swim so a bit tired & not at my most intelligent… I was too close to my glass stove top and cracked the whole stove top!!! … and I have 3 degrees, one of them, in physics! At least my chicken was excellent!
Oh…sorry to hear about your glass stove top. 😯 But happy to hear your chicken was excellent! 👍
I mean, this works for a chicken breast that thick. But what about chicken cutlets? When it’s thinner, the chicken cooks too quickly before the color is achieved. If I use lower heat, it cooks slower, but never gets the color before it’s done. My mom suggested adding sugar, which does give it color, but I can never get it right and the pan starts to burn.
Great question! My Aunt Helen was a pro at doing this with thin chicken cutlets. Her secret was to ensure the bottom of the pan was completely covered with a layer of cooking oil and that the oil was nice and hot before the cutlets hit the pan. As you noticed, the cutlets cook quickly so you basically need to deep-fry them to brown the outside. About 1 1/2 to 2 minutes per side – without touching the cutlet while it cooks – should do the trick. One final hint: socially distance each cutlet in the pan. Cooking too many cutlets at once will crowd the pan and steam them – rather than brown them.